I recently updated and released the source code to Sega Sprite Viewer. This tool allows you to view the contents of sprite roms from many popular Sega games of the era.
Hardware that (should) be supported includes:
- Sega Hang-On Hardware (including Enduro Racer & Space Harrier)
- Sega System 16 (Golden Axe, Altered Beast, Shinobi etc.)
- Sega System 18 (Moonwalker, Shadowdancer etc.)
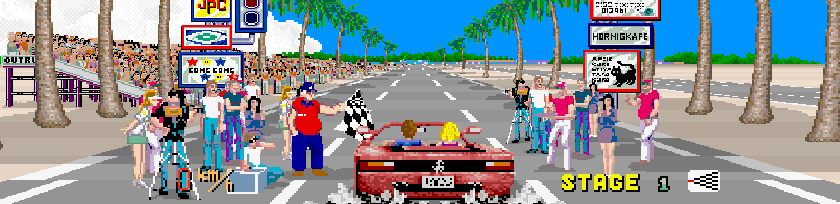
- Sega OutRun (including Super Hang-On)
- Sega X-Board (AfterBurner, Thunderblade etc.)
- Sega Y-Board (Power Drift, G-Loc etc.)
Part 1: Viewing Sprites
Let's take an example System 16 game, in this case Altered Beast. First up, we can establish the configuration of the sprite roms by looking at the MAME System 16 driver here.


- Format 0 specifies System 16 sprite format.
- This example places the sprite roms in a sub-directory named roms/altbeast/
- The offset and length of the files are configured to match the MAME driver.
- You can view the final configuration file here for reference.
Now we can load the sprites into the viewer by passing the name of our XML file as a command line argument:
s16_viewer altbeast.xml
s16_viewer altbeast.xml
Everything looks good. And you could stop here if you wanted. But you might be curious as to why the graphics are greyscale...
Part 2: Extracting Palettes
The sprite roms themselves don't contain colour palette information, or in fact anything particularly useful beyond the raw pixels. Palettes are contained in the actual 68k CPU program code. The process for extracting the palette is different on a per-game basis. But the general principles remain the same. Here, I'll discuss how I extracted the palette data for Altered Beast.

Establish the location of Palette RAM
Altered Beast is a System 16 based game. For System 16 games, the location of palette RAM is allocated dynamically at run-time by the Sega 315-5195 Memory Mapper. (Note, that other Sega hardware titles will configure the location of palette RAM differently - the point is that it's a sensible first step to determine its location).Using the MAME debugger we can view the configuration of the memory mapper once the game is running:

- View the 315-5195 Memory Mapper m_regs configuration.
- The yellow highlighted value ($84) at offset $1d contains the details we are interested in.
- This value is left shifted by $10, giving us the location of palette RAM: $840000
- Often the sprite palette is at offset +$800 within the palette RAM. Therefore $840800. (I know this part through pattern recognition, but it can also be established from decompiling the code further, as we shall see later.)
I can sanity check $840800 is the right location for sprite palettes by filling its contents with garbage whilst the game is running.
Here, I've filled the fast part of RAM with the value "$1111" repeatedly. As you can see from the circled sprites, these have lost their palette information and are rendered as black silhouettes.
Now, we could just save the contents of palette RAM at $840800 into a file and load that directly in the sprite viewer. However, this wouldn't contain all the palettes the game uses - only the ones loaded into memory at this moment in time. Therefore, it wouldn't be particularly comprehensive. We would find that many palettes were missing.
Establish where Palette RAM is populated from
If we can establish where the palette RAM is populated from within the code, then we are highly likely to locate the data table containing all the palette information. We can set a memory watch point at $840800. This will informs us when palette RAM is written to, and the part of code responsible for this.

I've set a watchpoint at $840800-$840804. Whenever a value is written to this address program execution halts.
We can now view this section of code that copies data into sprite palette RAM in more detail in the MAME disassembler. I've annotated this with some comments, in green, on the right hand side.

The main takeaways from this section of code are as follows:
- Address register A2 points to a table of address information containing the source address in ROM and destination address in palette RAM to move the values between.
- Address register A0 is loaded with the source address. (a location in the program ROM)
- Address register A1 is loaded with the destination address. (sprite palette RAM)
- It should be noted that 28 bytes are copied, not the full 32 bytes required by sprite hardware. This is important palette format information we will need later.
Now we can step through this routine to get some clues as to where the palette data is originally located. However, as all addresses are setup from address register A2, we need to mine deeper into the code still, to establish where this table of pointers is first configured.
By watching the memory location specified by A2, we can work our way back to the following program code:

From this section of code we can not only establish where the first palette entry is stored in rom, but also the total number of entries. This key points are as follows:
- A byte is used (0-255) as an index into the table of entries. So we can assume that the palette table contains 255 entries max (highlighted in yellow and loaded to D0).
- This routine specifies $242a0 as the first sprite palette entry (highlighted in yellow and loaded to A1).
- We established each entry was 28 bytes previously. This means the table is $1be4 in length (28 bytes * 255 entries).
This gives us the final solution to our puzzle. We know where all the palette entries are first stored, before palette RAM is even accessed. We also know how many entries are in the table.
Save the Palette table to a Binary file
We can now save the palette as follows using the MAME debugger:
save altbeast.pal, 0x242a0, 0x1be4, 0
This can be added to our sprite viewer XML configuration as follows:

We specify the number of bytes per entry, and the fact that the palette data is offset by 1 word when displayed by hardware. Essentially, the sprite hardware expects 32 bytes per entry, but the first and last words are not populated in the palette data.
Viewing the Palette
Finally, we can load the sprite data and view it in glorious colour by cycling through our 255 palettes. One limitation is that we still have no way of automatically connecting a palette to a sprite. This information is also contained in the 68k program code and is unique on a per-game basis.
I hope this has been informative! If you successfully create both a palette and configuration file, let me know and I'll add them to the source code repository.


